
The Asus ZenFone 4 (A400CG/A450CG), ZenFone 5 (A500CG) & ZenFone 6 (A600CG) are the latest Android Smartphone’s launched in India. If you have brought any one of them and looking to have screen capture of your device screen, then this guide will sure help you out. It is easy guide with out the use of Android applications. Just follow the easy procedure and take a screenshot in no time.
Asus ZenFone 4, ZenFone 5 & ZenFone 6 Screenshot guide:
Screenshots are useful when you achieved high milestones on Android Games and wanted to show the scores to your friends and many other ways. The screenshots of Asus ZenFone can be performed by two methods- 1. Using Hardware buttons and 2. Using Settings options
Quick Pre-requisites:
- Asus ZenFone Smartphone (ZenFone 4, 5, 6)
- Select a Screen whose screenshot has to be taken
- Basic knowledge to operate the android device
How to take Screen capture on Asus ZenFone 4, ZenFone 5 & ZenFone 6 devices
Method 1: Using Hardware Buttons
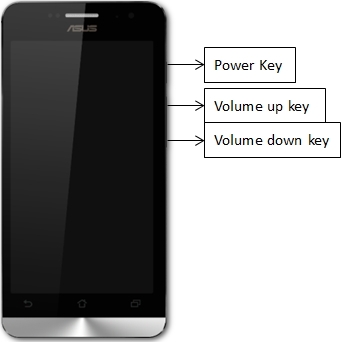
- Take your Asus ZenFone and select the screen to be captured.
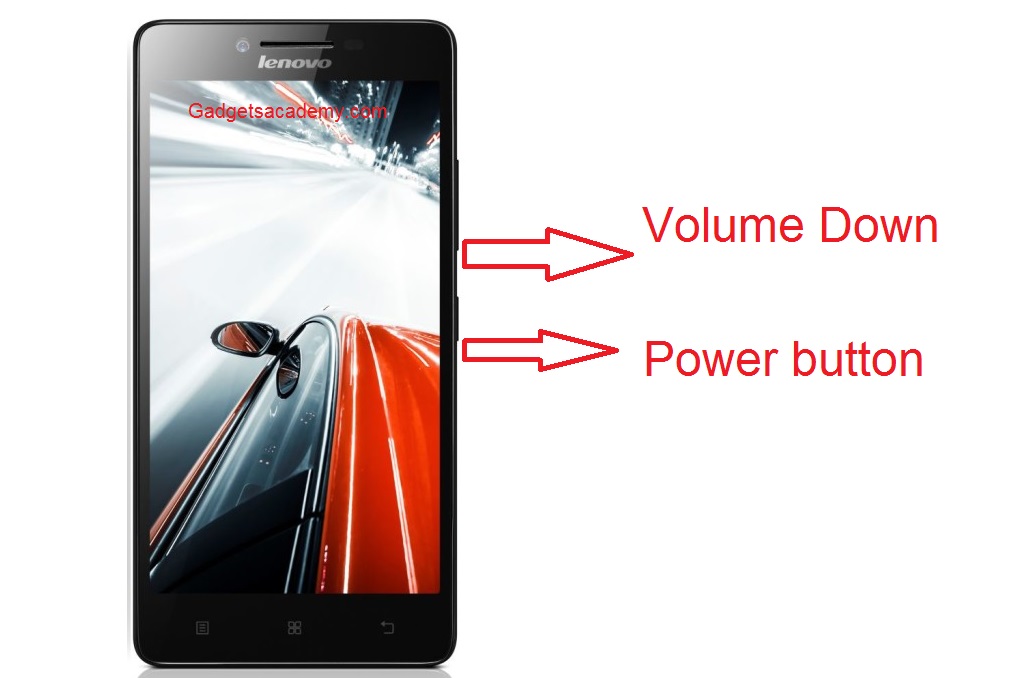
- Locate the Hardware buttons on your device- Volume Down and Power buttons. Now press the Volume down and Power button (Volume down + Power button) at the same time for a second. Release as soon you heard the shutter sound.
- The screen will flick and you will see the image of screen capture on the notifications bar. You can select from it to view or else the screenshot will be saved to gallery with the folder name Screenshots.
- Congratulations! You have successfully taken Screenshot on your Asus ZenFone 4, ZenFone 5 & ZenFone 6
Method 2: Using device Settings

- This is the second method for screen capture using the device settings. For screenshots go to “Applications > Settings > Choose ‘Asus customized from options’ > Choose ‘Key settings’ > Choose ‘Tap and hold to get screenshot > Navigate to the screen you want to capture > Press and hold Multi taking icon to capture the screenshot (will present at right side of below soft keys)’”.
- That’s it the screenshot will be saved to the folder >Internal storage > Screenshots
Any problems while taking the screen capture, do lets us know by leaving a comment below as we are always there to help you out. Like us Facebook for latest tech news, guides, tips and tricks.
